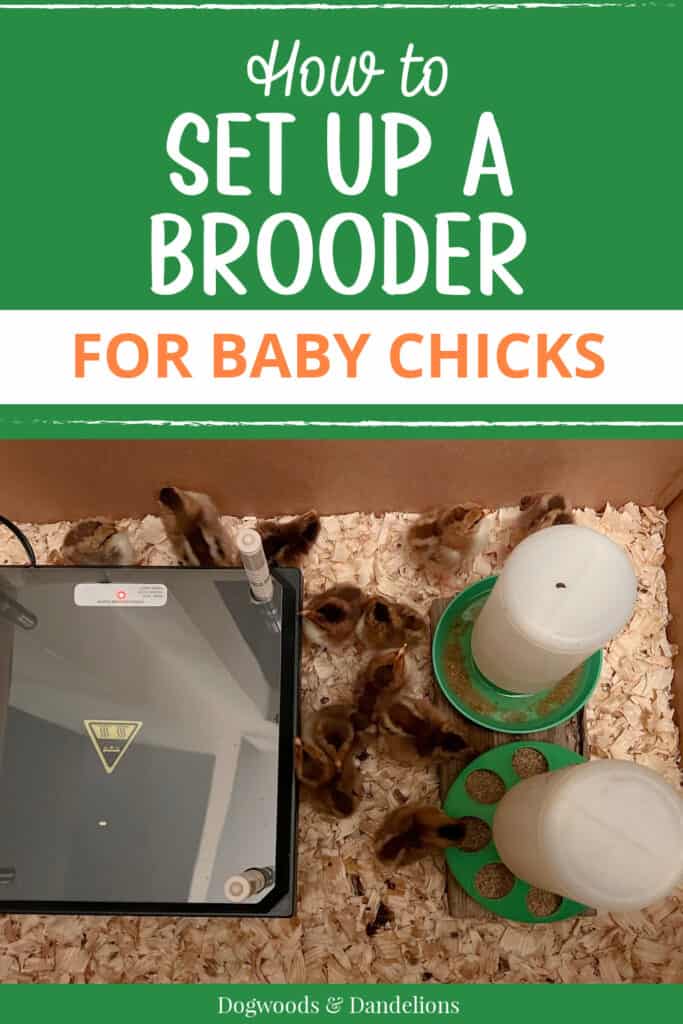
How to Set up a Brooder for Baby Chicks
Inside: Learn how to set up a brooder for baby chicks.
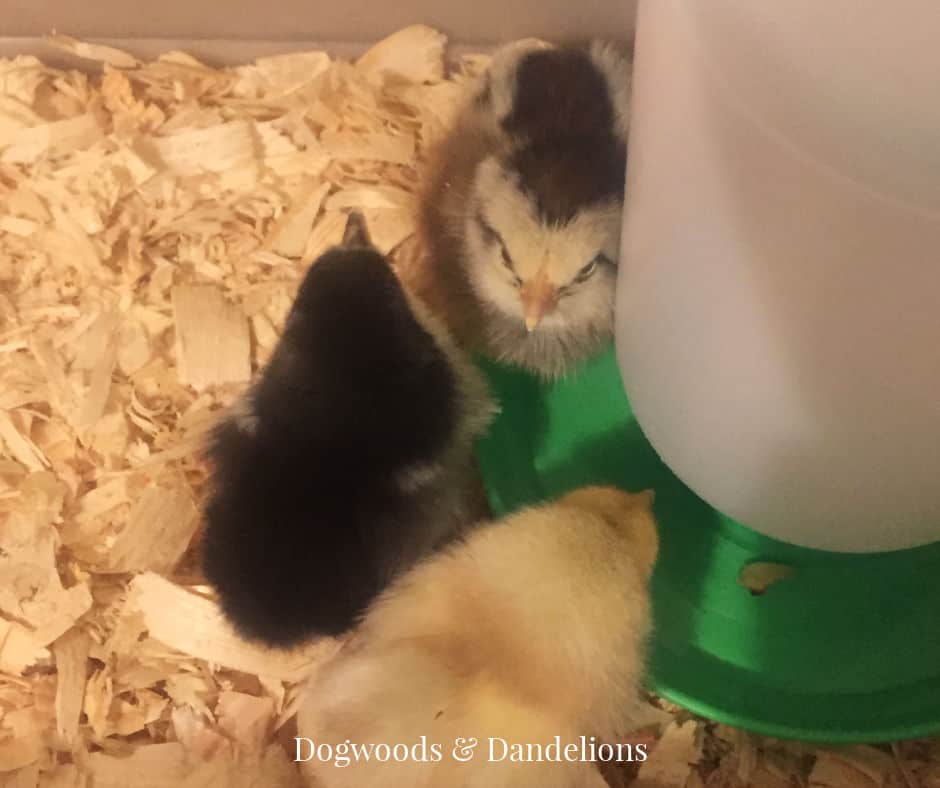
You walk into the feed store and hear “cheep, cheep, cheep.” You follow the noise until you see the cute, fluffy, baby chicks.
You really want to take some home right now.
But is that such a good idea?
Not really.
At least not until you have a brooder set up for your new chicks. And how do you go about setting up a brooder? Keep reading for some helpful ideas.
Before You Bring Those Baby Chicks Home
One of the first things you need to do BEFORE bringing your baby chicks home from the feed store is to set up your brooder. This is the place your baby chicks will live for the first few weeks or up to several months of their lives.
You will need to decide whether you will raise your chicks indoors or in a sheltered location such as a garage or barn where they are safe from predators and won’t get too cold.
If you plan on raising them indoors, be prepared to dust regularly and often. Once your chicks are outside, you will probably have to do a thorough cleaning of the area.
Baby chicks learn to scratch very early and they stir up an incredible amount of dust. We raised our first batch of 6 chicks in a tote in our master bath. They were only indoors for a month but they created an unbelievable amount of dust on every surface.
Affiliate Disclosure: Please note that some of the links in this article may be affiliate links and I may receive a small commission if you purchase something through a link. It will not change your cost. As an Amazon Associate, I earn from qualifying purchases. For more information, see my disclosures page.)
Choosing What to Use As a Brooder
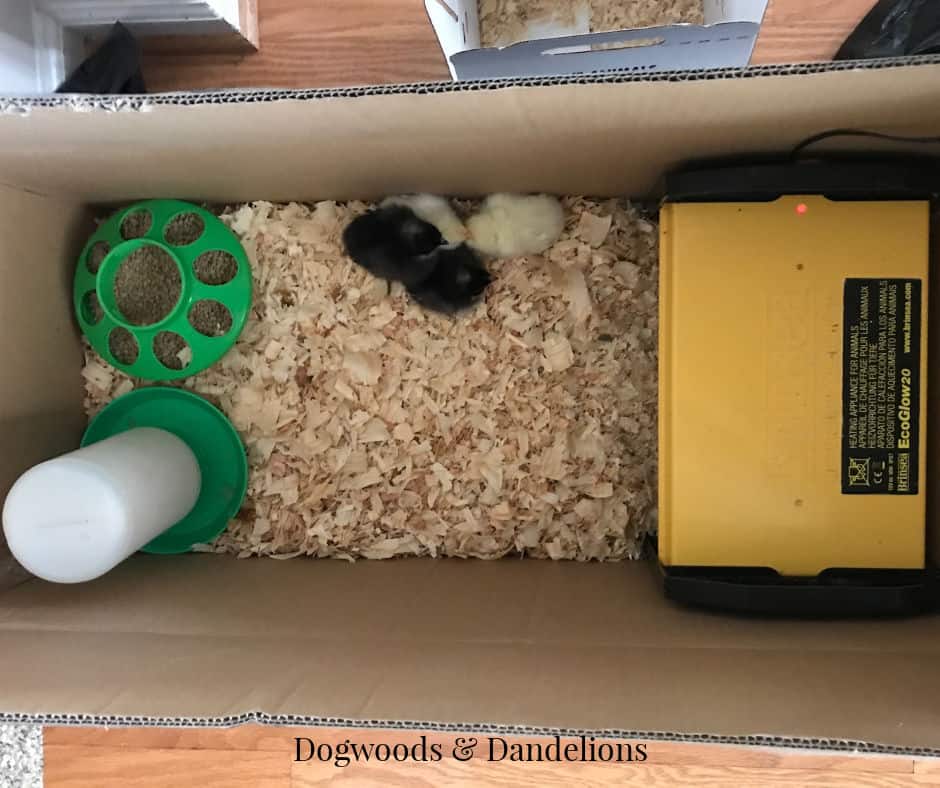
You will also need to decide what you are going to keep your baby chicks in. There are many types of things to choose from. You can start out with something as simple as a large cardboard box or a plastic storage tote from the store. A large galvanized feed trough is also an excellent option.
There are also many things available to purchase, such as dog playpens or special brooder boxes but I recommend using something free (cardboard box) or cheap (tote) to start out.
Using a Cardboard Box as a Brooder
Cardboard boxes make an excellent DIY chick brooder. One advantage to setting up a brooder in a cardboard box is that it is disposable. After the chicks are ready to be moved to the coop, the box can either be trashed or used in the garden to keep down weeds.
There is nothing to store from year to year, especially if you aren’t sure you will want baby chicks again soon.
Another advantage to a cardboard box is that the brooder area can be enlarged. With a knife and some tape, you can cut matching holes into two boxes and expand the brooder space significantly.
The only real disadvantage to a box is that chicks tend to be very messy and they will spill water everywhere. If you use a cardboard box, I highly recommend placing a tarp or some black plastic underneath the box before setting up your brooder, especially if you are setting it up indoors.
Using a Plastic Tote
Another option (and the one I usually use) is a plastic tote. I purchased a large clear tote from Walmart for less than $10 and have used it for many years. It is easy to clean and you can even pick it up and take it outside if you wish to give your chickens some fresh air.
Whichever option you choose, you will need to find a cover for the top. Baby chicks learn to fly quickly and will be out of the brooder before you know it.
You can cut holes in the lid of the plastic storage bin or place a piece of chicken wire over the top if you use a box. I place a piece of chicken wire or hardware cloth over the top of my tote. It is easy to remove to clean the area and it allows plenty of air for the chicks.
Other Needs for Baby Chicks
There are a few other things you need besides just a brooder box when raising baby chicks.
Bedding for Baby Chicks
Baby chicks need some type of bedding to absorb moisture and odors in the bottom of the brooder box. They also use this material to dust bathe.
My first choice of bedding is pine shavings. Pine shavings are very absorbent, readily available, and pose no harm to the baby chicks.
Other options to line the floor of the brooder include chopped straw, sand, or shredded newspaper. Chopped straw is ok if it is finely chopped, but pieces too large can cause your chicks to get sour crop if they eat it. For this reason alone, I don’t like straw in the chicken brooder or the coop.
Sand works well for a lot of people. However, I’m not a huge fan because it is more expensive and doesn’t absorb odors as well.
Plus, bags of sand are heavy. And it is generally not recommended to add much sand to your garden, and I like to compost my pine shavings.
Shredded newspaper doesn’t absorb odors well either, and it quickly grows mold if it gets wet. If you do use newspaper, replace it every other day.
Some people use a thick layer of paper towels in the bottom for the first few days, but my chicks always seem to try to eat them, so I stick to pine shavings.
Do not use cedar shavings. The cedar can be toxic to chicks in large amounts, and your chicks will peck and even eat some of the shavings.
A Heat Source
Another thing to consider before bringing home your chicks is a supplemental heat source. Young chicks need to be kept warm. The ideal temperature for their first week is about 95 degrees.
Radiant Heaters
You can purchase inexpensive heat lamps at local feed stores, but I highly recommend a Brinsea Eco-glow brooder. An Eco-glow works through radiant heat.
It allows the chicks to run under it when they are cold, but allows them to wander out if they get too warm, much like they would do with a mother hen. (For more information on why I chose the Brinsea Ecoglow radiant heater, check out this post.)
The one downside to a radiant heater is that it has to be used where the room temperature doesn’t drop below 55 degrees Fahrenheit. Otherwise, it may not provide enough heat to keep the young birds sufficiently warm. (Chicks that get too cold can experience many health problems and even death!)

Heat Lamps
If you choose to use a heat lamp, you will have to adjust the lamp weekly, as baby chicks don’t need as much warmth in successive weeks. So if you go the heat lamp route, you also need to purchase a thermometer so you can monitor the brooder temperature.
And place the heat lamp at one end of the brooder so that the chicks can move away from the heat if they get too hot. I recently saw several posts in some chicken groups where people allowed the temperature to get too hot and killed their poor baby chicks.
The optimal temperature for day-old chicks is 95 degrees. Each week you should lower the temperature in the brooder by 5 degrees. The best way to accomplish this is by raising the heat lamp.
Keep in mind that the heat lamp will have to remain on 24 hours a day, 7 days a week. This means you will have to leave it on while at work and all during the night.
Traditional heat lamps are extremely dangerous, causing many fires each year. The heat lamp will also add a significant amount to your electric bill.
Full disclosure – I used a heat lamp the first two years I raised chicks. However, knowing how much of a fire hazard they are, I would not use one again. I would hate to lose my house because I didn’t spend the extra $75 or so for an Eco-glow.
Heat Plates
Recently, heat plates have been appearing on the market. We bought a heating plate last year and it worked well for our chicks also. They are as safe as radiant heaters and will also provide sufficient heat to keep your little chicks warm.
The one we purchased is no longer available, but this one looks even easier to adjust than the one we bought.
Food & Water
Plenty of food and clean water are a priority when you raise baby chicks. At the feed/farm store, you will need to purchase a feeder, a chick waterer (this + this) or a feeder/waterer combo, and a bag of chick starter (feed). It is best to get a small feeder and waterer for the baby chicks at first.
You don’t want the feeder and waterer taking up too much space in the brooder. Also, you will have to clean out the waterer very frequently, at least once a day.
Baby chicks will poop in their water and scratch wood shavings into it (if you are using them). (They are messy little creatures!) Just know that you will need to purchase a bigger size later.
What You Need To Set Up A Brooder:
- heat lamp/Eco-glow
- brooder (cardboard box or plastic tote)
- pine shavings
- feeder
- chick waterer (this + this)
- chick starter
And of course…baby chicks!
It is relatively easy and inexpensive to prepare for baby chicks. You just need a few specialized items that you can find at most feed or farm stores.
Once You Have Your Brooder Set Up
Once you have your brooder set up, you need to know what to do with those cute baby chicks when you bring them home.
And since baby chicks grow very quickly, you need to know when it is safe to move them to the coop. Otherwise, you may have to make a larger brooder to ensure your young chickens have adequate space. (Overcrowding causes pecking issues and disease.)
Hopefully, you have a secure chicken coop ready and waiting. If not, check out my two chicken coops to give you a couple of ideas for building your chicken’s their permanent home. And if space allows, always, always, always, build a bigger coop than you think you will need! Once you have a few chickens, you’ll surely want more!
Related Posts
- What You Need to Include in Your Chicken Coop
- What is Pasty Butt in Chicks?
- Foods You Shouldn’t Feed Your Chickens
- Friendliest Chicken Breeds
- How Many Chickens Should I Get?

Meet Julie
I’m a farm girl born and bred in North Carolina. I’ve been growing a vegetable garden for over 20 years (and helping my Mom grow hers even longer). I’ve been raising chickens in my bathtub and backyard for 12+ years. I believe that homegrown food can be made simple. Let’s get started.
Great article! clear and to the point!
Thank you Julie!
Thank you! I’m glad it was helpful.
This is by far one of the most helpful and practical posts for beginners! I am basically following all of your advice, which seems to be an excellent compilation of other things I’ve read. Thank you so much for the excellent information, resources, and images!
Awww. Thank you so much for your kind words. You truly made my day! I try to share practical advice that is doable for most chicken keepers.